Do you want to hear the good news…or the bad news first? This has been an age old question which the Bitcoin markets had to grapple with this week. As we will see below, there IS a correct answer to this…but has Bitcoin chosen wisely?
All I want for Christmas is a Ledger!
Ledger is doing a crypto starter bundle! Get a USD$25 voucher to buy crypto with every Ledger Nano X purchase! Limited to 5,000 vouchers and only available until 29th December 2020!
Gift yourself or your family a bundle they truly want! Say NO to hand cream gift sets and socks!
Check out our Ledger Nano X review and CLICK HERE TO BUY!

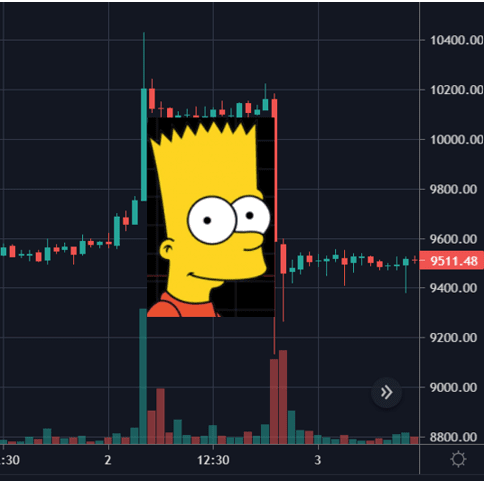
Market Sentiment: Going sideways?
This week’s market price action wasn’t very exciting, with Bitcoin and Ethereum mostly going sideways. On 12th December 2020, we saw a reaction that is still continuing today and has brought $BTC back to the $19000 area and $ETH closer to $600.
Both coins are still at weekly resistances trying to build momentum around the 21 EMA (Exponential Moving Average) on the daily chart. We could expect another attempt to pass ATH in the next few days!
Key news this week
Big investors keep accumulating
Big funds/companies are buying and accumulating Bitcoin and Ethereum.
Massachusetts Mutual Life Insurance Company (MassMutual), has just bought $100M of $BTC through NYDIG, a fund management company in New York. This is reportedly their first Bitcoin purchase and is equivalent to less than 1% of their entire investment account worth around USD $235 billion.
Grayscale has also increased their holdings. Whilst they are not new to investing in crypto, they have just bought another 130000ETH, reaching a total of 3 million tokens in their accounts.
Microstrategy announced they had completed “a $650M offering of 0.75% Convertible Senior Notes Due 2025”, to invest in $BTC in accordance with their reserve policy. A few days earlier, the CEO Michael Saylor, tweeted that they hold approximately 40,824 Bitcoin.
The interest in crypto by financial giants points to increased demand from the wealthy as a form of diversification and are them betting on prices to increase in the future.
Mt. Gox’s reimbursement deadline approaching
15th December 2020 will mark the next deadline for Mt. Gox Exchanges’s creditors to hopefully get back what they lost on the platform. The Exchange, one of the most known at the time and launched in 2010, ceased to operate in February 2014 after filing for bankruptcy. A whopping 860,000 $BTC were “missing” of which 200,000 has been “recovered” (and this does not even include other cryptocurrencies which also went “missing”). In 2015 new evidence by Tokyo security company WizSec showed that “most or all of the missing bitcoins were stolen straight out of the Mt. Gox hot cryptocurrency wallet over time, beginning in late 2011.”
Users of the platform should expect to receive a total of 140,000 $BTC ($2.6 billion dollar worth) which are now in the hands of Nobuaki Kobayashi, the Japanese lawyer in charge of the process.
Nothing is certain however as the refund deadline had been already postponed several times in the past, the last of which was in October 2020. There is also a serious concern in the market as to the possible consequences of a large Bitcoin market sell-off by victims when they receive their funds after 6 years. Considering Bitcoin in 2014 was worth less than $1000, this would represent now a roughly 20x on their re-acquired funds!
Singapore’s DBS to launch digital exchange with crypto
After rumors appeared a few months ago, it is now official: Singapore’s DBS will be the first bank to launch a digital currency exchange.
The platform will only be open to institutional and accredited retail investors. There will be 4 major tradable cryptocurrencies: $BTC, $ETH, $XRP and $BCH, paired with 4 FIAT currencies: USD, SGD, HKD AND JPY.
The Exchange will also offer Security Token Offerings (STO) and a platform for tokenized assets like bonds, private equity funds, real-estates and so on. DBS Chief Executive Piyush Gupta said:
“I believe that the time is right for this”, and added “We are on the cusp of a massive tokenization and therefore you’ll find tokenization of all kind of assets around the world and I think more and more exchanges will start dealing with the tokenized assets”.
U.S. Congressmen manifesting doubts on new self-hosted wallets regulations
A couple of weeks ago we mentioned that Coinbase CEO Brian Armstrong was concerned regarding rumors that the U.S Treasury was planning to impose regulations on self-hosted cryptocurrency wallets.
Self-hosted wallets, whether online (hot) like Metamask or offline (cold) wallets like Ledger and Trezor, let you retain personal and total access to your funds, without any intermediary entities or third parties. The owner possesses their own private keys and takes full responsibility of their funds. Most importantly, wallets don’t usually need KYC procedures to set up. Learn more about hot and cold wallets, and their pros and cons.
Armstrong stated his thoughts (shared by many other prominent names in crypto space), among which the possibility that regulations could result in being more harmful than anything else. This is because it could essentially exclude those who cannot obtain the documents and proofs for regular KYCs, and those are usually the most disadvantaged groups who may already be excluded from the financial system. Furthermore, this proposal could be a step back in innovation by the US, leading companies and users to bypass them for other countries.
A few days ago Warren Davidson, U.S. Congressman serving Ohio’s 8th District, together with a few colleagues, embraced these opinions by sending a letter to U.S Treasury. The letter also points out that “multiple reports have shown that digital assets are not widely used by illicit actors”.
What about Europe?
Meanwhile in Europe, the development of the digital Euro continues. However sources have indicated that the French Finance Ministry is preparing “to not only harden know-your-customer (KYC) rules for crypto firms but also regulate crypto-to-crypto transactions, according to Simon Polrot, president of French crypto association ADAN.”
This apparently comes as a response to recent terrorist attacks when 29 people were arrested for illegal terrorism funding via cryptocurrencies.
Other key news
- Canada has become the first country to have an Ethereum-based Fund listed on a major stock exchange. The Ether Fund (TSX:QETH.U) is offered by 3iQ Corp, a digital asset manager based in Toronto. The Ether Fund is trading at around $11 per share today.
- Steve Wozniak, Apple Co-Founder has just launched Efforce, a project bridging virtual currencies and green Tech. Efforce serves as a “digital marketplace” where energy efficient projects can raise funds via its own currency, $WOZX. The project famously received overwhelming support from investors as its market cap reached $950 million within 13 minutes of its launch.
- The second giveaway of DCEP (China’s National Digital Currency) has kicked-off on in Suzhou, China, on 12th December 2020 for 10,000 winners. Last week, the Hong Kong Monetary Authority (HKMA) also confirmed it is working with the Digital Currency Institute of the People’s Bank of China on technical pilot testing of DCEP for cross-boarder payments between Mainland China and Hong Kong. You can read more in our article.
- Messari, a leader crypto Research and Data company, has recently listed their take on the “top 10 people to watch in 2021”
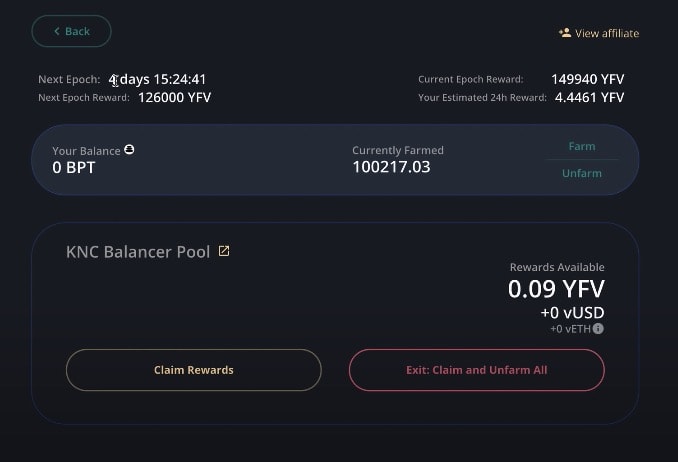
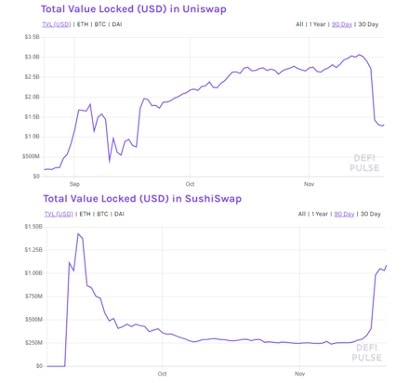
$YETI Index: the Yearn ecosystem in one token
After all the recent announced collaborations between the Yearn Finance team and many other big Defi projects, such as Cover Protocol ($COVER) or Sushiswap ($SUSHI), the Yearn Ecosystem Token Index, $YETI, has been created by Powerpool ($CVP).
The Index comprises of 8 tokens: $YFI, $SUSHI, $CREAM, $AKRO, $COVER, $K3PR, $CVP, $PICKLE with a proposed weighted distribution of 35% for $YFI, 17% for $SUSHI and 8% each for the rest. So investors now have the chance to invest in the entire Yearn ecosystem in one token, receiving “cash flows from Vault strategies applied to composite tokens, and vote on proposals in the Yearn ecosystem governance using PowerPool’s meta-governance approach.” It will also allow holders to save on gas fees which would be normally required to stake multiple tokens.
Speaking of $YFI, this week we have also witnessed the first gasless (for users) transaction vault deposit on Yearn.Finance.
Red flags of the week
DeTrade Fund, first case of deep-fake in crypto?
DeTrade Fund, a supposed upcoming arbitraging and front-running Defi project has vanished with 1450ETH a few hours before listing.
The team appeared to be non-anonymous, with public Linkedin profiles, a publicly registered company, a Twitch profile and a video where the “CEO” Mark Jensen, spoke to the community. The video has quickly become famous on crypto Twitter with the community suspecting it was a deep-fake used by crypto hackers. Another theory circulating around the community is that the hackers hired an actor to impersonate the CEO.
Through two rounds of presale investments, the DeTrade fund team managed to raise a remarkable amount of 1,450 $ETH in a few hours. Their contracts were audited by Solidity Finance which immediately raised a few concerns in their audit report, assessing that the team was in charge of too much power over users’ funds. It is likely that the team took advantage of this and stole the presale funds sometime between the second presale and the official listing which should have taken place a few hours after. (Tramadol)
Several hours later and probably because someone was able to trace the misappropriated funds, 70% of the stolen $ETH was sent back to investors via internal transactions.
This “partial return is becoming more and more common in DeFi attacks. For example, Eminence’s hacker sent back 50% while Harvest Finance users only received 10% of their amount back.
$12 million have been stolen by Compounder Finance
On 1st December 2020, Compounder.Finance ($CP3R), a clone of Harvest and Yearn Finance, has “pulled the rug”. It looks like the anonymous team behind the project is the one to blame.
Compounder had been audited by Solidity Finance. In chat logs between the two companies we can see that Solidity Finance pointed out that the project’s Treasury contract and updating of strategy pools is controlled by their team. Solidity Finance also pointed out that they felt this fact should be disclosed in their audit report. The exploit was exactly as pointed out by Solidity Finance. After the audit, the withdraw function was swapped with a malicious one which was later used to drain all the money in the contract to their deployer address. Nobody recognized the fraud in time so users were not able to withdraw their funds.
The attack is composed by 4 steps and is explained in details in this post-mortem by developer Vasa and Solidity Finance.
It is not the first time that an audited project suffered a hack and we all know quite well by now that Audits cannot guarantee 100% safety. This should always be reminded.
A known developer of the Defi space and owner of Defiyield.info was also a victim of the attack. He is also investigating the matter and working towards filing a case with the relevant enforcement authorities.
Fake Deriswap tokens
Malicious actors have recently created various fake Deriswap tokens to take advantage of the hype surrounding this latest experiment from Andre Cronje. The malicious actors would create tokens with similar names to Deriswap and approve it for trading on Uniswap to entice people to buy.
Let’s remember that Deriswap doesn’t have any official token at the moment!
Boxmining happenings
- Libra is now Diem! Everything you need to know on Facebook’s cryptocurrency!
- In case you missed it check out our podcast interview with Geralt of CyberFi where we discussed automated trading, Ethereum interactions such as unstaking and more.
- Velo Protocol is building out the biggest payment network in South East Asia with its partnership with Lightnet and Visa. The end goal is to create payment solutions for the under-served micro, small and medium enterprise lending market in Asia.
Click here for back issues of our newsletters!
Disclaimer: Cryptocurrency trading involves significant risks and may result in the loss of your capital. You should carefully consider whether trading cryptocurrencies is right for you in light of your financial condition and ability to bear financial risks. Cryptocurrency prices are highly volatile and can fluctuate widely in a short period of time. As such, trading cryptocurrencies may not be suitable for everyone. Additionally, storing cryptocurrencies on a centralized exchange carries inherent risks, including the potential for loss due to hacking, exchange collapse, or other security breaches. We strongly advise that you seek independent professional advice before engaging in any cryptocurrency trading activities and carefully consider the security measures in place when choosing or storing your cryptocurrencies on a cryptocurrency exchange.